
Create your ecommerce Website using React.js + Strapi + SnipCart in under an hour
In this tutorial you will be able to launch your online store in under an hour using the latest technologies : React.js , Strapi and SnipCart .
Here is the main sections of this tutorial :
Sections :
- Build your Backend using Strapi
- Create a React.js app to display products
- Create a SnipCart account & integrate it in your React.js app
#1# Build your Backend using Strapi :
- What is Strapi ?
Strapi is an open source Headless CMS that gives you the ability to create your models quickly and generate the admin panel in a few clicks where you get your whole CMS setup in a few minutes.
Strapi offers you the possibility to fetch any data you might need via a REST API or GraphQL endpoint. That‘s Why Strapi !
- Setup Strapi :
Using Strapi you have the possibility to use MySql , Postgresql , Sqlite or mongodb . In this tutorial I will setup Strapi with a postgresql database .
So let’s get started !


To install strapi make sure you meet these requirements :
Node.js : only LTS versions are supported (v12 and v14)
npm 6.x
- create strapi project and choose postgresql
npx create-strapi-app my-project
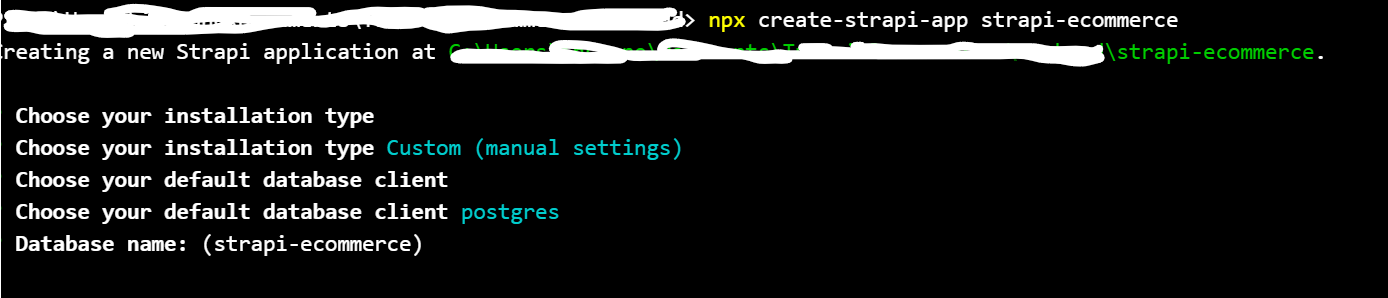
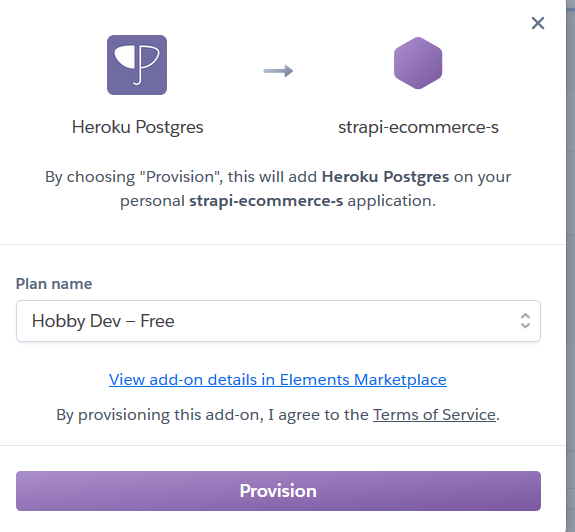
At this stage , don’t panic , we are going to create our postgresql database , all what you have to do is to create a new heroku app + add a postgresql addon (start free ) :
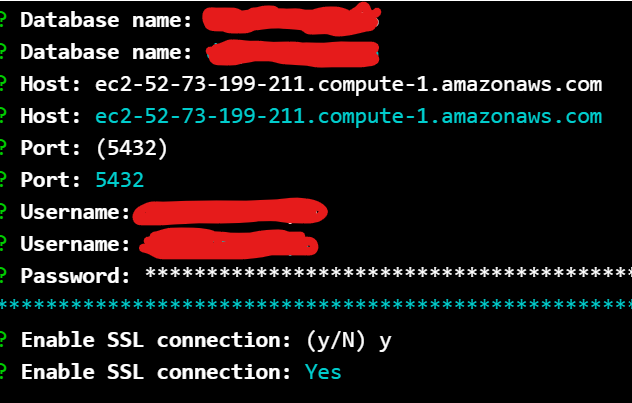
Now you can go and get your database credentials

Then , go back to your terminal and add what you have got :
If you run into an issue , you can try creating a quickstart strapi project and then replace your database config file (config/database.js) with this :
module.exports = ({ env }) => ({
"defaultConnection": "default",
"connections": {
"default": {
"connector": "bookshelf",
"settings": {
"client": "postgres",
"host": "YOUR_HOST",
"port": "5432",
"database": "YOUR_DATABASE_NAME",
"username": "YOUR_USERNAME",
"password": "************************************",
"ssl": { "rejectUnauthorized": false }
},
"options":{
"pool":{
"min":0,
"max":20,
"idleTimeoutMillis":30000,
"createTimeoutMillis":30000,
"acquireTimeoutMillis":30000
}
}
}
}
}
);
additionally run this command to install postgresql package :
npm install pg --save
2 . Now , go to your admin dashboard : localhost:1337/admin

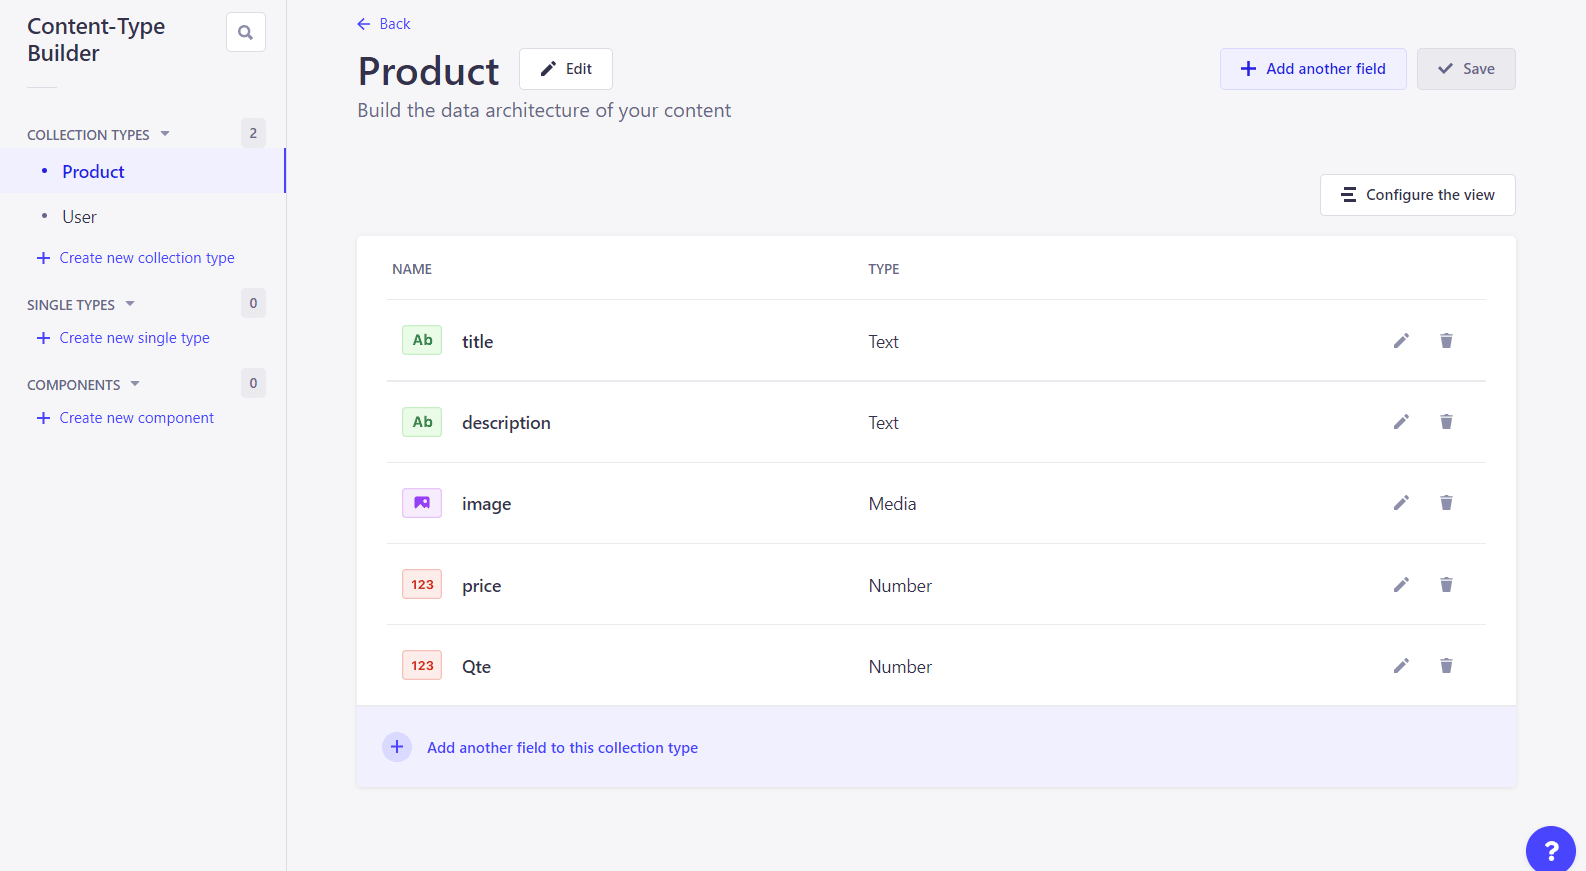
3 . The next step is to create a content-type which is our product model , in this example I will define a product by : title , description , image , price and quantity .
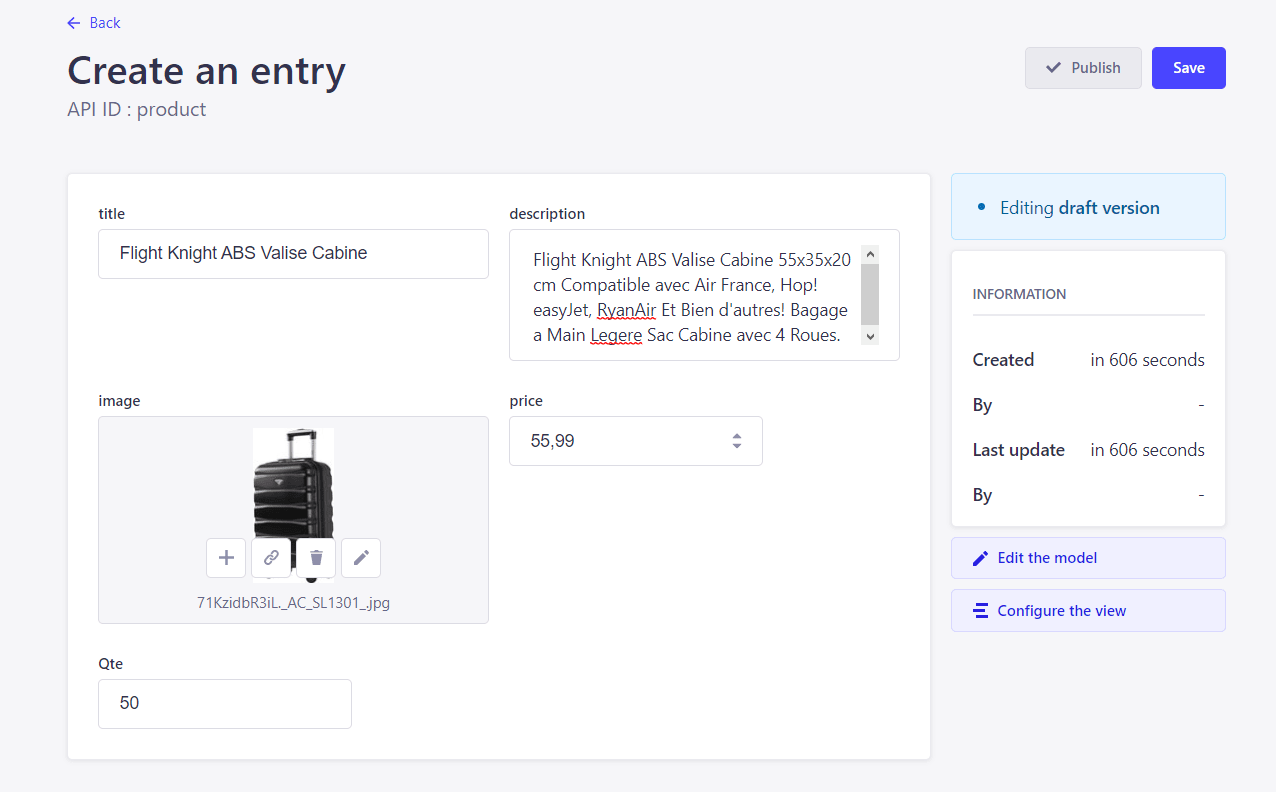
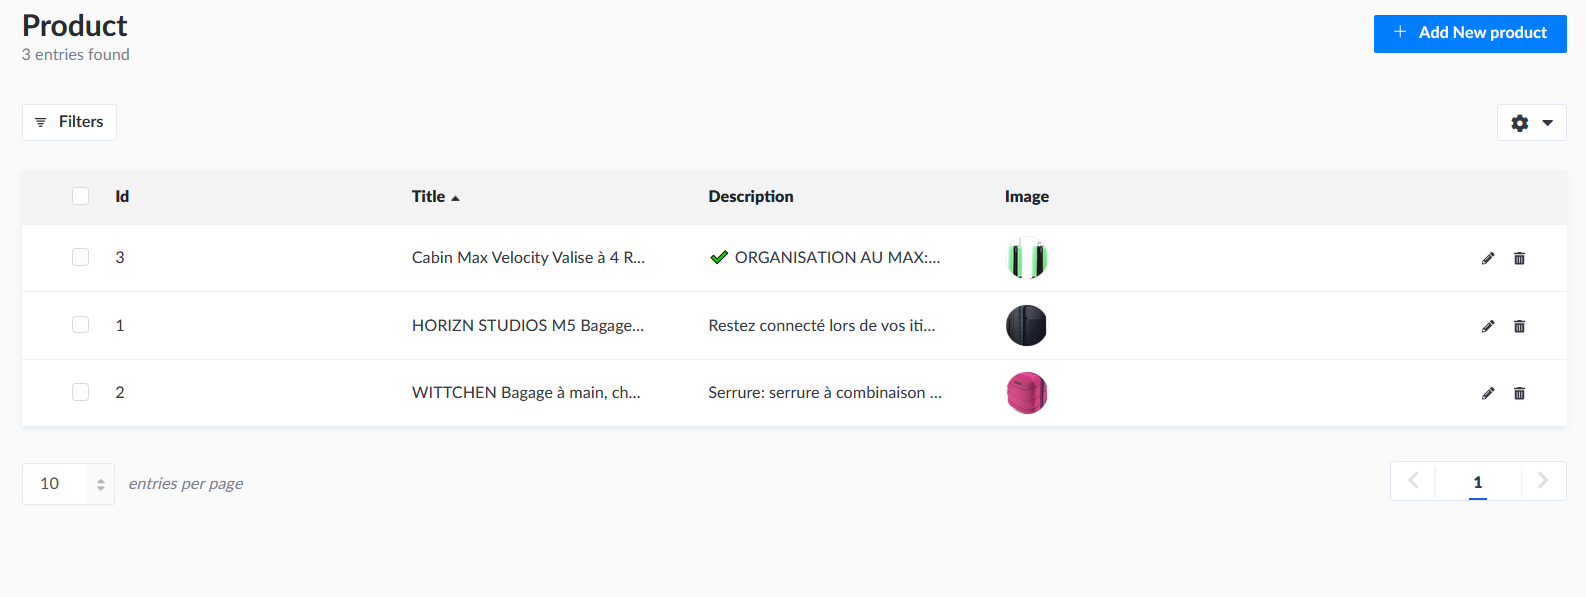
4 . Then , go and add your products :
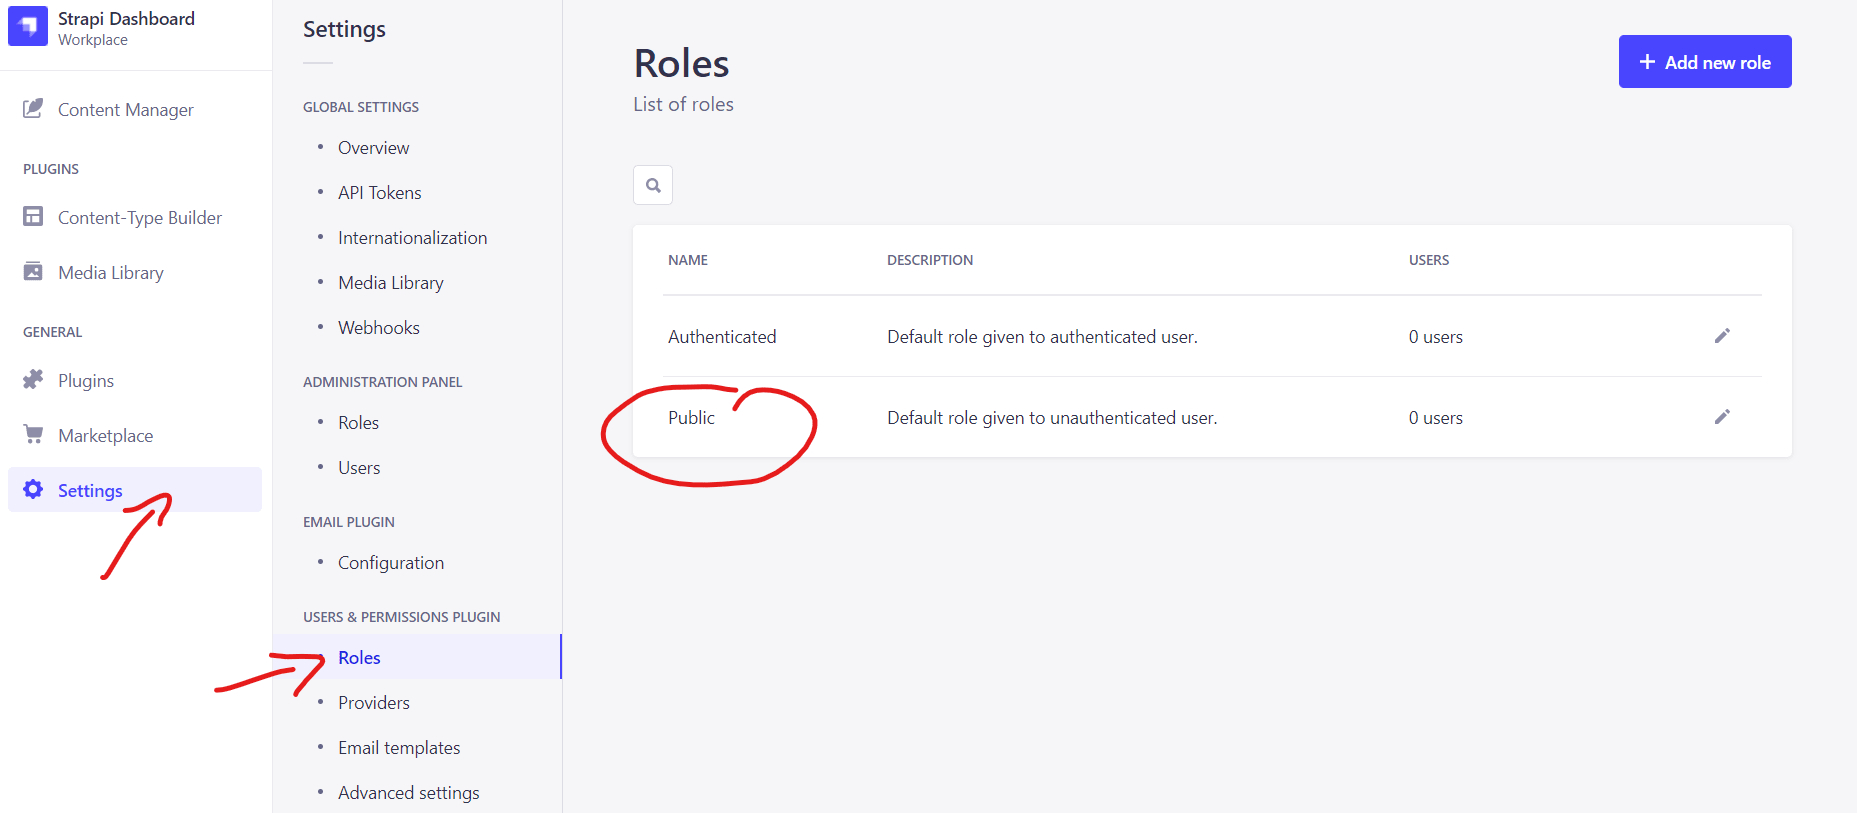
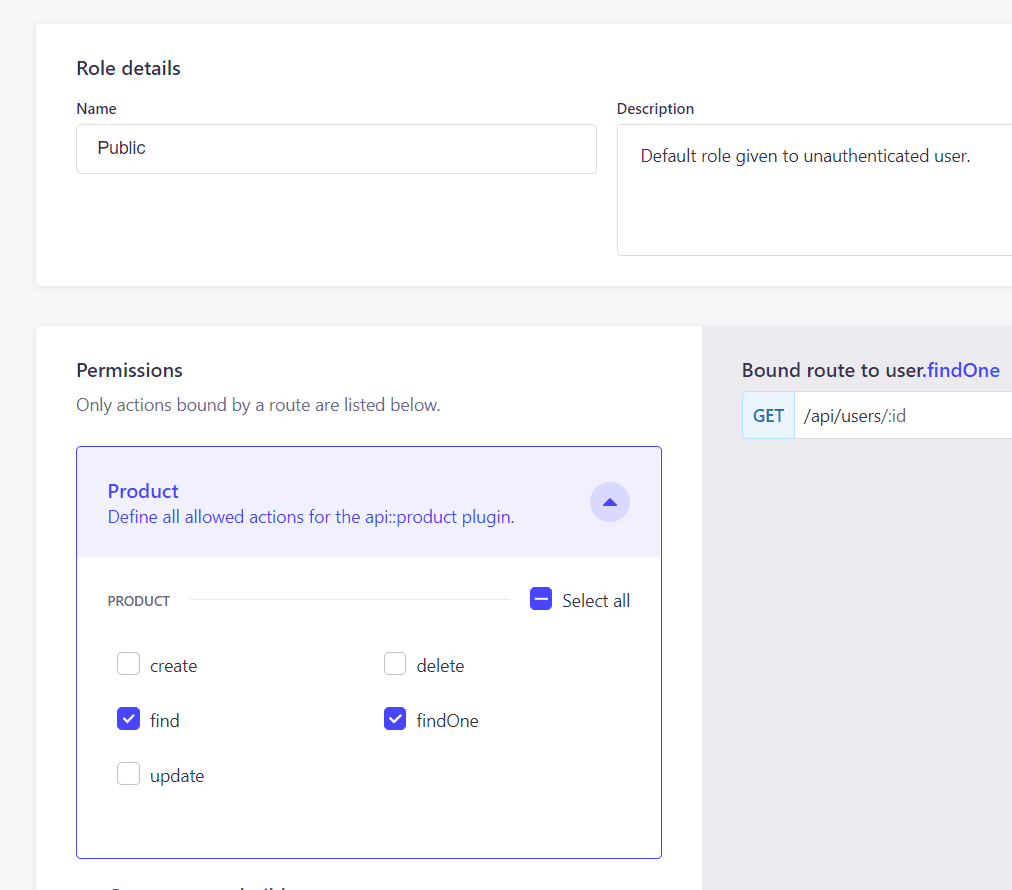
Everything is settled , the last thing we must do is to turn the product’s route permissions to public : ( count , find , findOne )
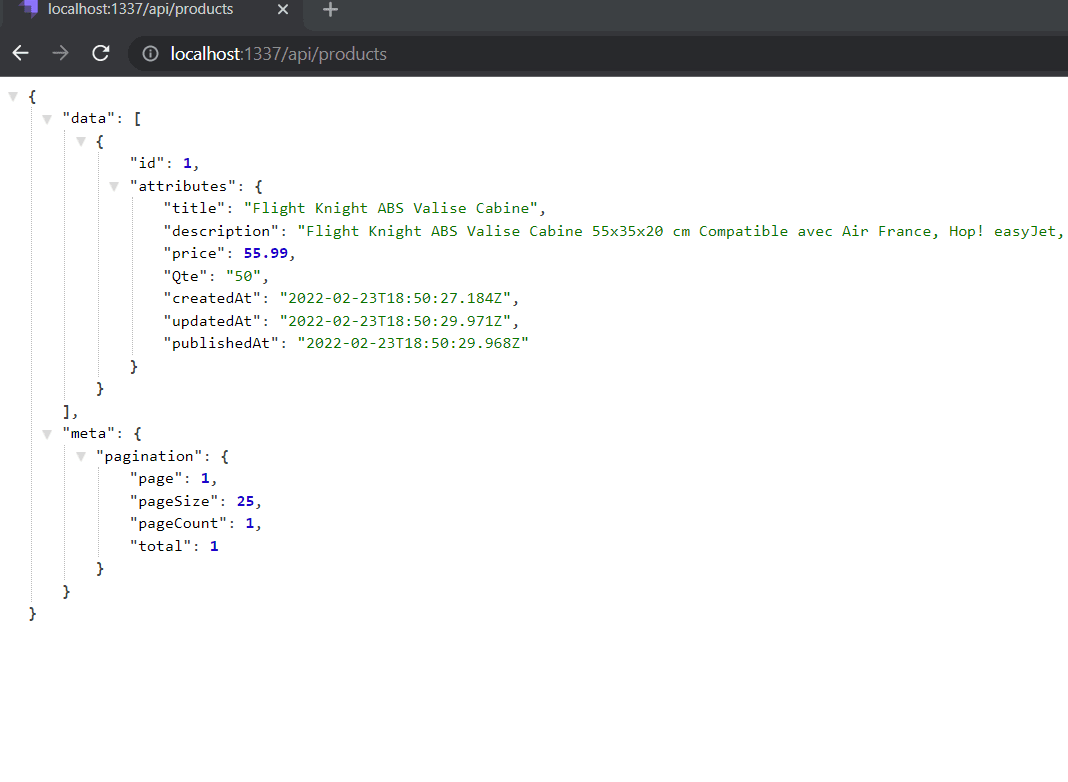
5 . Testing our API :
Congrats ! now time to create our react.js app .
#2# Create a React.js app to display products :
I will be using this project of AlexSegen :
https://github.com/AlexSegen/react-shopping-cart
You can create your own design , but if you are going to use the same project as mine , you have to modify some files , to simplify the job I will leave you my own version here .
[change the react_app_host environment variable to your strapi url ]
Otherwise , all you have to do is to fetch over your API .
- Product context :
import React, { createContext, useState , useEffect } from 'react';

export const ProductsContext = createContext()

const ProductsContextProvider = ({children}) => {

const [hasError, setErrors] = useState(false);

const [products, setProducts] = useState(null);

const fetchData = async () => {

const res = await fetch(`${process.env.REACT_APP_HOST}/products`);
res
.json()
.then((res) =>{
setProducts(res)
console.log("success",res)
})
.catch((err) => setErrors("error :",err));

}

useEffect(() => {
fetchData();
}, []);

return (
<>
{ products && <ProductsContext.Provider value={{products}} >
{ children }
</ProductsContext.Provider>
}
</>
);
}

export default ProductsContextProvider;
2. Cart Item :
import React, { useContext } from 'react';
import { PlusCircleIcon, MinusCircleIcon, TrashIcon } from '../../components/icons'
import { CartContext } from '../../contexts/CartContext';

import { formatNumber } from '../../helpers/utils';

const CartItem = ({product}) => {

const { increase, decrease, removeProduct } = useContext(CartContext);

return (
<div className="row no-gutters py-2">
<div className="col-sm-2 p-2">
<img
alt={product.title}
src={`${process.env.REACT_APP_HOST}${product.image.url}`} className="img-fluid d-block"/>
</div>
<div className="col-sm-4 p-2">
<h5 className="mb-1">{product.name}</h5>
<p className="mb-1">Price: {formatNumber(product.price)} </p>

</div>
<div className="col-sm-2 p-2 text-center ">
<p className="mb-0">Qty: {product.Qte}</p>
</div>
<div className="col-sm-4 p-2 text-right">
<button
onClick={() => increase(product)}
className="btn btn-primary btn-sm mr-2 mb-1">
<PlusCircleIcon width={"20px"}/>
</button>

{
product.quantity > 1 &&
<button
onClick={() => decrease(product)}
className="btn btn-danger btn-sm mb-1">
<MinusCircleIcon width={"20px"}/>
</button>
}

{
product.quantity === 1 &&
<button
onClick={() => removeProduct(product)}
className="btn btn-danger btn-sm mb-1">
<TrashIcon width={"20px"}/>
</button>
}

</div>
</div>
);
}

export default CartItem;
3. Product item
import React, { useContext } from 'react';
import { Link } from 'react-router-dom';
import { CartContext } from '../../contexts/CartContext';
import { formatNumber } from '../../helpers/utils';

const ProductItem = ({product}) => {

const { addProduct, cartItems, increase } = useContext(CartContext);

const isInCart = product => {
return !!cartItems.find(item => item.id === product.id);
}

return (
<div className="card card-body">
<img style={{display: "block", margin: "0 auto 10px", maxHeight: "200px"}} className="img-fluid"
src={`${process.env.REACT_APP_HOST}${product.image.url}`} alt=""/>
<p>{product.title}</p>
<h3 className="text-left">{formatNumber(product.price)}</h3>
<div className="text-right">
<Link  to="/" className="btn btn-link btn-sm mr-2">Details</Link>

{
isInCart(product) &&
<button
onClick={() => increase(product)}
className="btn btn-outline-primary btn-sm">Add more</button>
}

{
!isInCart(product) &&
<button
onClick={() => addProduct(product)}
className="btn btn-primary btn-sm">Add to cart</button>
}

</div>
</div>
);
}

export default ProductItem;
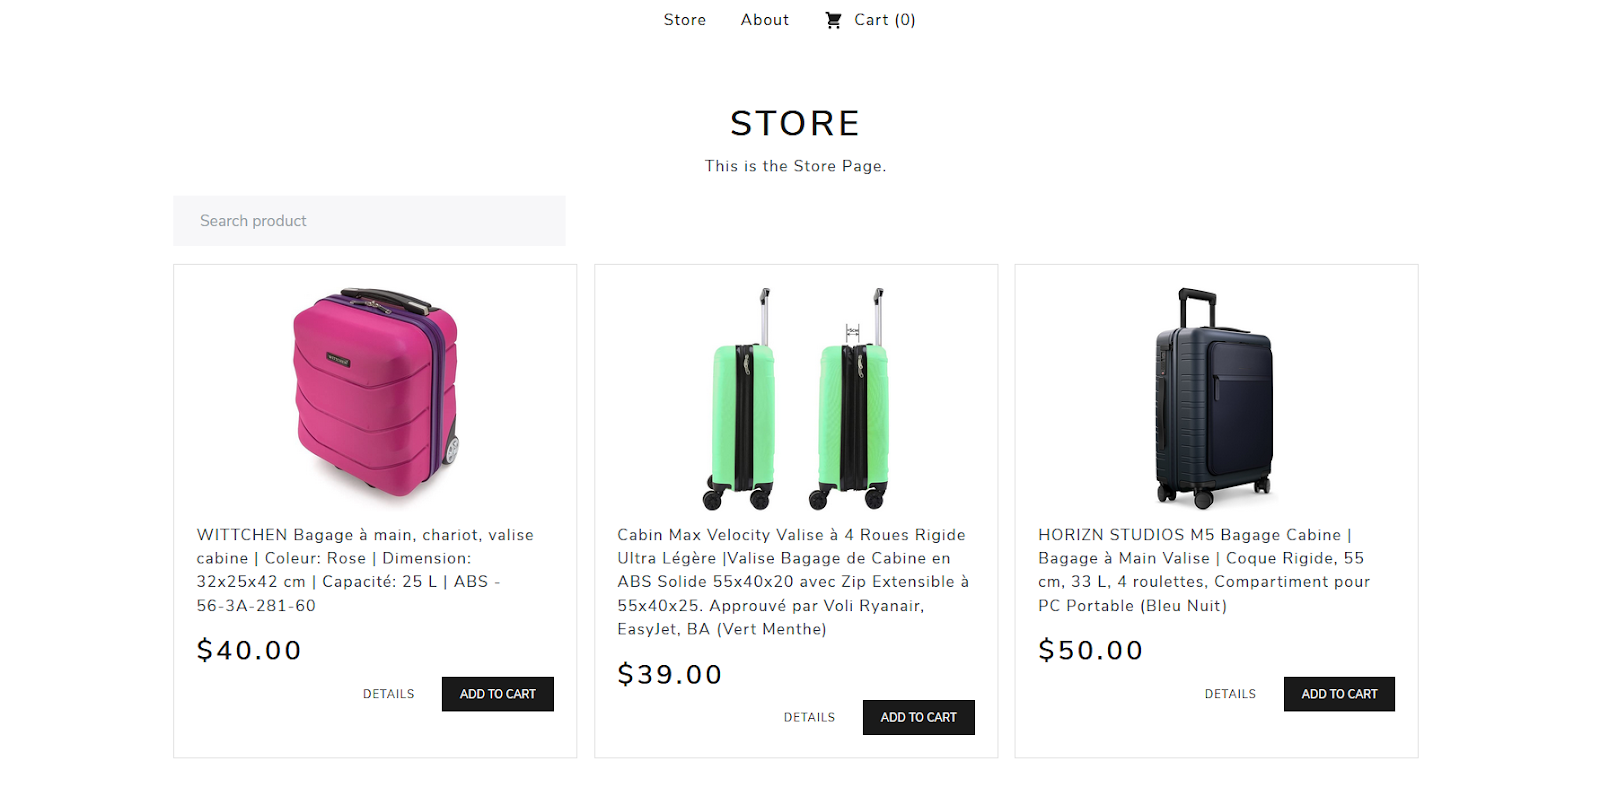
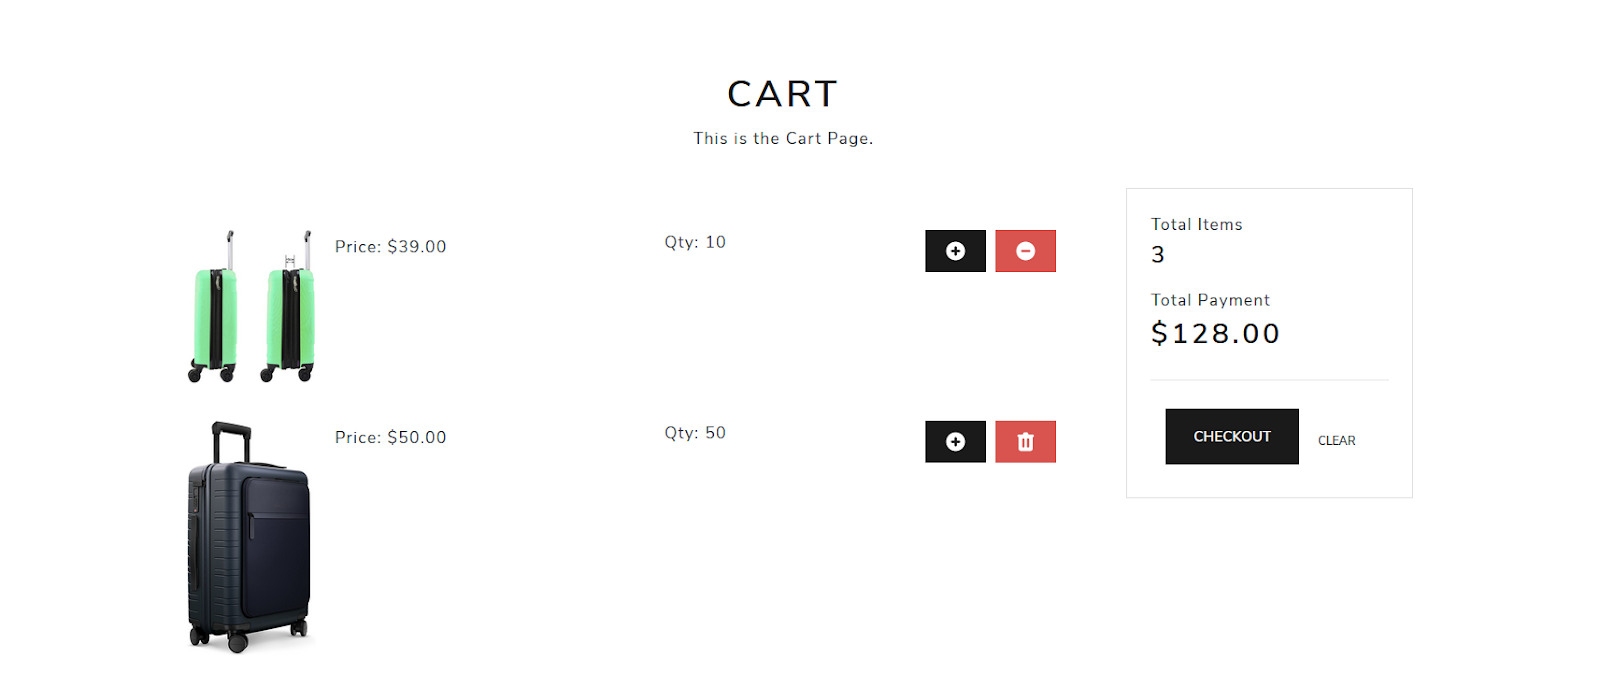
4. Final View :
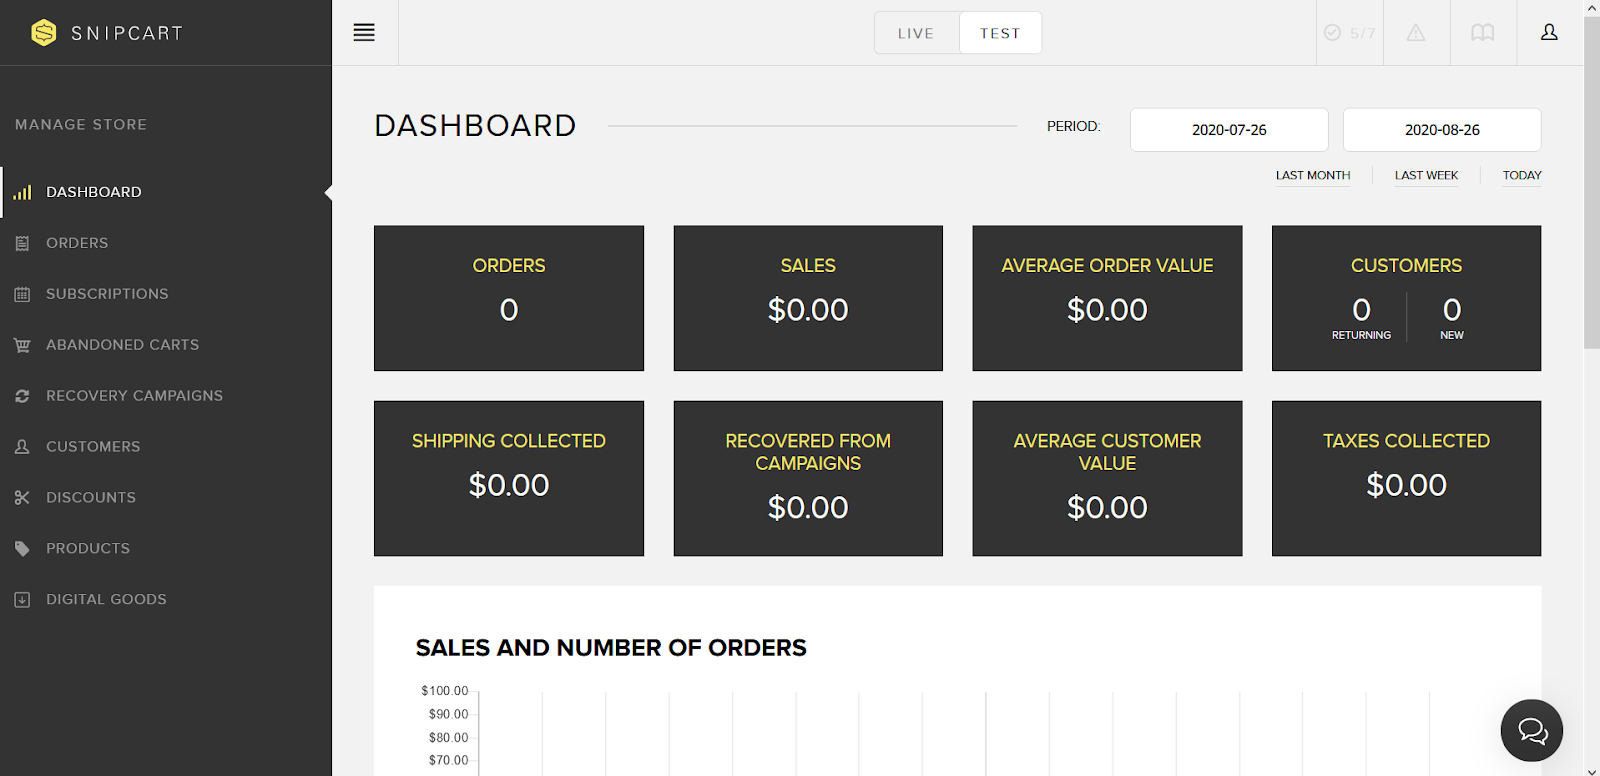
Here is the final view of the website :
The last step is adding the checkout configurations , but before , you must deploy the strapi project to heroku using the app created in section 1 .
#3# Create a SnipCart account & integrate it in your React.js app :
1.What is Snipcart ?
Snipcart is a third party shopping cart which can be integrated easily with any framework or CMS .
2.Why Snipcart ?
When you want to build a fast e-commerce solution to save time and focus on other features I highly recommend you to use snipcart , you can see the main differences and compare it with other existing third parties in this link .
3.How to integrate Snipcart in this project ?
#Step 1 :
First you need to create a snipcart account and turn on the test mode .
#Step 2 (Optional) :
Let snipcart know your allowed domain name so it can be shown while sending invoices …

#Step 3 :
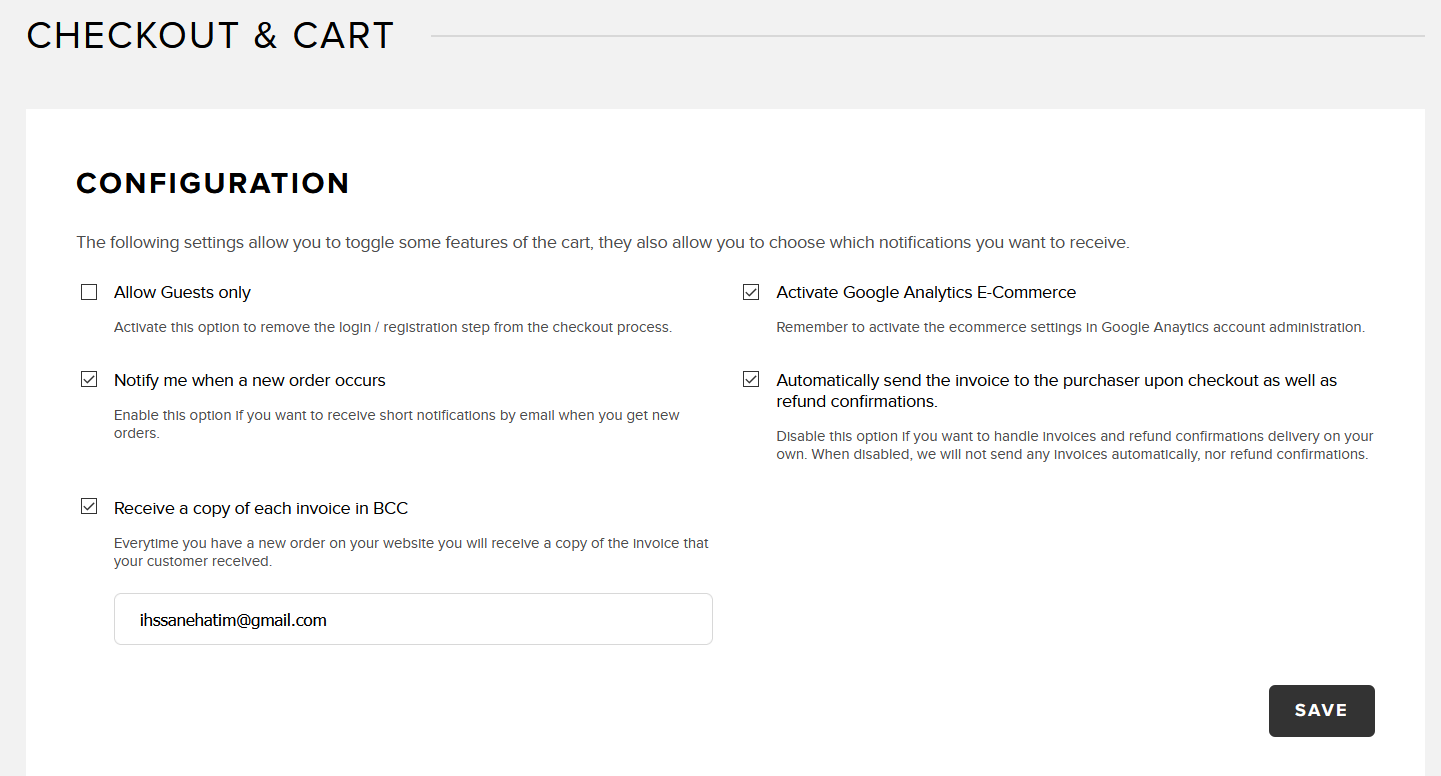
Check the features you need on snipcart :
#Step 4 :
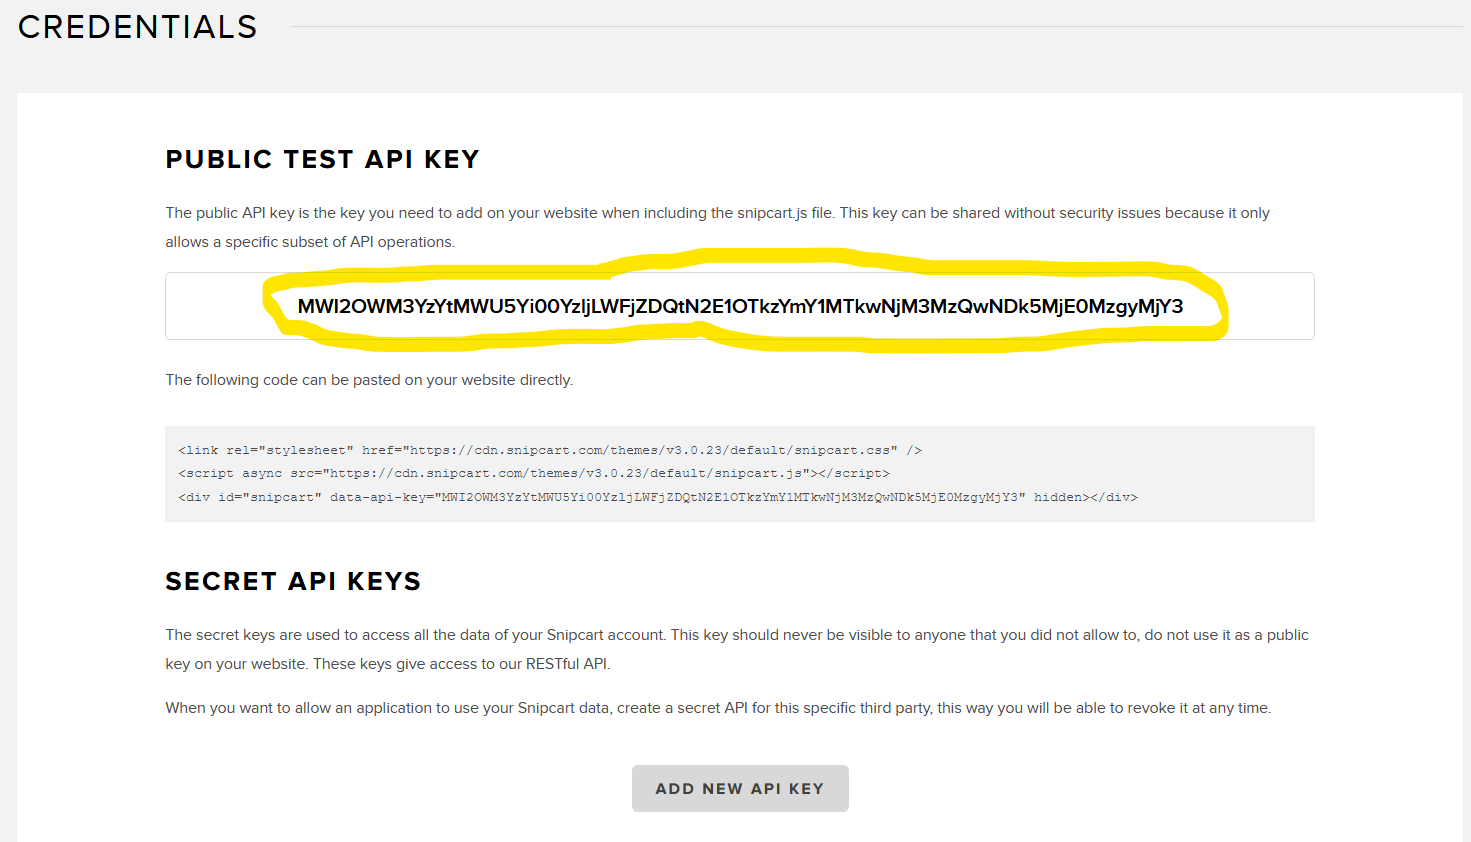
We need to get our API key to add it on our index.html page , you can find it on API keys section as shown below :
After , add this lines into public/index.html in your react app :
<script async src="https://cdn.snipcart.com/themes/v3.0.22/default/snipcart.js"></script>
<div id="snipcart" data-api-key="YOUR_PUBLIC_KEY" hidden></div>
to use snipcart’s style :
<link rel="preconnect" href="https://app.snipcart.com">
<link rel="preconnect" href="https://cdn.snipcart.com">

<link rel="manifest" href="%PUBLIC_URL%/manifest.json" />
<link rel="stylesheet" href="https://cdn.snipcart.com/themes/v3.0.22/default/snipcart.css" />

<link rel="stylesheet" href="https://cdn.snipcart.com/themes/v3.0.22/default/snipcart.css" />
#Step 5 :
Now back to our react components , all we need is to add snipcart-* classNames and some tags to our product item component so snipcart can process them :
import React, { useContext } from 'react';
import { Link } from 'react-router-dom';
import { CartContext } from '../../contexts/CartContext';
import { formatNumber } from '../../helpers/utils';

const ProductItem = ({product}) => {

const { addProduct, cartItems, increase } = useContext(CartContext);

const isInCart = product => {
return !!cartItems.find(item => item.id === product.id);
}

return (
<div className="card card-body">
<img style={{display: "block", margin: "0 auto 10px", maxHeight: "200px"}} className="img-fluid"
src={`${process.env.REACT_APP_HOST}${product.image.url}`} alt=""/>
<p>{product.title}</p>
<h3 className="text-left">{formatNumber(product.price)}</h3>
<div className="text-right">
<Link  to="/" className="btn btn-link btn-sm mr-2">Details</Link>

{
isInCart(product) &&
<button
onClick={() => increase(product)}
className="btn btn-outline-primary btn-sm">Add more</button>
}

{
!isInCart(product) &&
<button type="button"
className="snipcart-add-item btn btn-outline-danger btn-sm"
data-item-name={product.title}
data-item-price={product.price.toFixed(2)}
data-item-description={product.description}
data-item-min-quantity="0"
data-item-max-quantity={product.Qte}
data-item-id={product.id}
data-item-url="/">
Add to cart
</button>
}

</div>
</div>
);
}

export default ProductItem;
As you have seen , the changed lines are fewer than you might do when using other solutions .
- className="snipcart-add-item” => to add the current item to the shopping cart .
- data-item-price={product.price.toFixed(2)} => set the price .
- data-item-description={product.description} => set the description .
- data-item-min-quantity="0" => set the minimum quantity someone can select while decreasing the number of items (optional) .
- data-item-max-quantity={product.Qte} => the number of items we have on our store (optional) .
- data-item-id={product.id} => we must set the id of each product .
- data-item-url="/" => we must provide the url where the product is displayed .
#Step 6 :
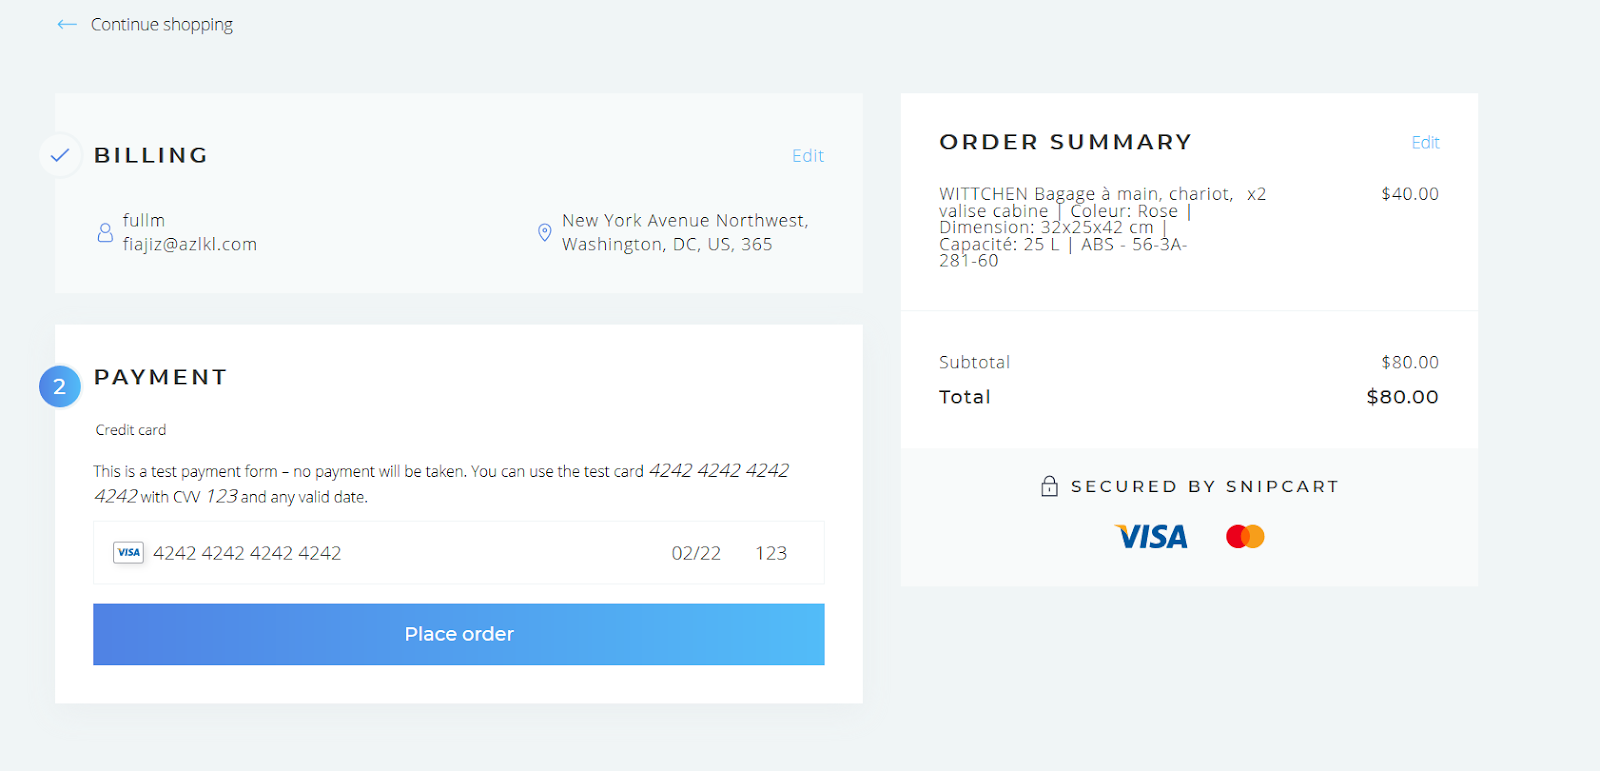
Final step is to test our shopping cart using a test payment form before going to live mode :
If you made it till the end I want to tell you that you have done a great job and if you need any help or advice you can comment below or contact me . Hope you enjoyed this tutorial and find it helpful !
Live demo :
Github repo :
 GitHub